For the instructions on how to use the chronograph (stopwatch function) of Cal. 9R96 and 9R86, refer to Chronograph (For Cal. 9R96, 9R86, 9R84).
How to wind the mainspring
This watch is an automatic winding type (with manual winding function).
The mainspring can be sufficiently wound automatically by natural movement of the arm while normally worn on the wrist. In addition, it can be wound by turning the crown.
Please see the power reserve indicator to check the level of the remaining power.
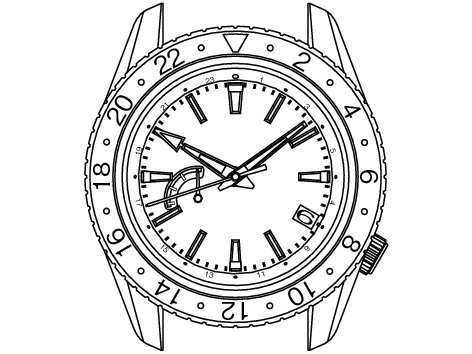
How to read the power reserve indicator
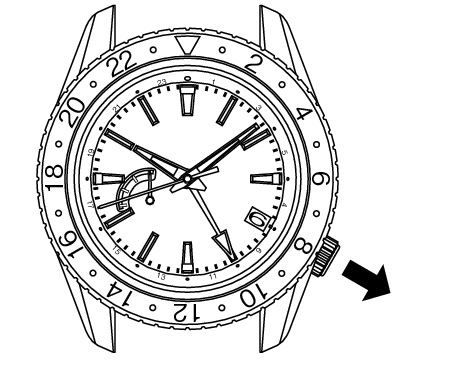
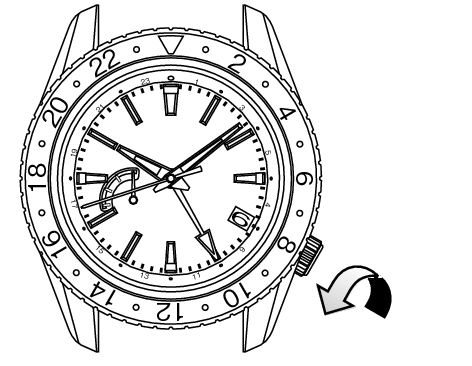
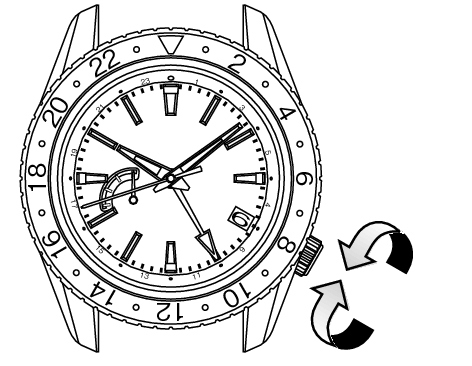
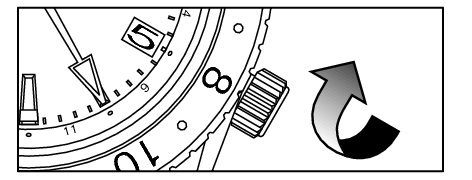
When starting to use a stopped watch, it is recommended that you turn the crown to wind the mainspring. To wind the mainspring, turn the crown at the normal position clockwise (12 o’clock direction) slowly. If you turn the crown counterclockwise (6 o’clock direction), it will turn free. Five full rotations of the crown will provide the power to run the watch for approximately ten hours.
If you wear the watch for twelve hours per day consecutively for three to five days, the watch will be fully wound.
Under a low-temperature condition (below 0°C), always keep at least one-sixth of the watch power shown by the power reserve indicator.
How to set the time and date
To set the time and date, set the 24-hour hand and minute hand first, and then set the hour hand and date.
When setting the time, make sure that the mainspring is sufficiently wound.
How to set the time
-
Make sure that the mainspring is sufficiently wound and the watch is working.
-
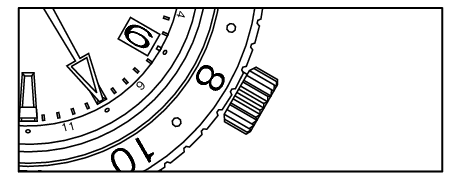
Unlock the crown.
-
Pull out the crown to the second click when the seconds hand (or the small seconds hand) is pointing at the “0” second position. The seconds hand (or the small seconds hand) will stop on the spot.
-
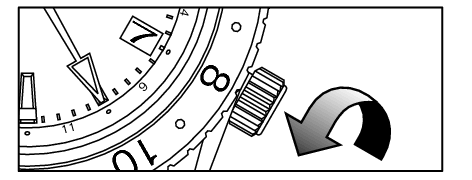
Turn the crown counterclockwise (6 o’clock direction) to rotate the 24-hour hand and minute hand clockwise and set them to the current time.
-
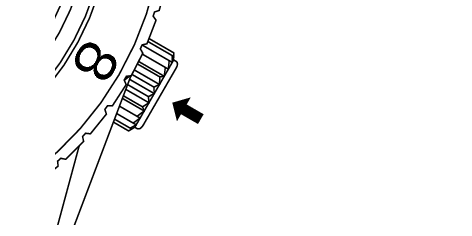
Push the crown back in simultaneously with the time signal.
-
To move on to the hour hand and date setting, pull out the crown to the first click.
-
Turn the crown to set the hour hand. While turning the crown, the moment the date changes is midnight. When setting the hour hand, be sure that a.m./p.m. is set correctly.
-
Push the crown back in to complete the time setting.
When setting the date and time, ensure that the watch is working.
Pull out the crown to the second click.
While doing so, set the minute hand a few minutes behind the correct time, and then slowly advance it to the desired time.
Only the 24-hour and minute hands are to be set first. Even if the hour hand is indicating incorrect time, or the date may be altered depending on the position of the hour hand, it is not necessary to make an adjustment at this stage.
Set the 24-hour and minute hands.
The setting of the 24-hour, minute and seconds hands (or small seconds hands) to the current time is now completed.

Push the crown back in simultaneously with the time signal.

Pull the crown out to the first click.
Set the date also at this point if necessary.
The crown can be turned in either direction to set the date, however, it is recommended to turn the crown in the direction which enables you to set the date with a smaller adjustment.
Turn the crown slowly, checking that the hour hand moves in one-hour increments.
When setting the hour hand, the other hands may move slightly. However, this is not a malfunction.
Relock the crown.
How to set the date
Two full rotations of the hour hand will change the date for one day.
The date advances one day by turning the hour hand two full rotations clockwise (for 24 hours), while the date is set back one day by turning the hour hand two full rotations counterclockwise.
Manual date adjustment is required on the first day after a month that has less than 31 days: February, April, June, September and November.
-
Make sure that the mainspring is sufficiently wound and the watch is working.
-
Unlock the crown.
-
Pull out the crown to the first click.
-
Each time the hour hand makes two full rotations by turning the crown, the date is adjusted one day. While turning the crown, the moment the date changes is midnight. When setting the hour hand, be sure that a.m./p.m. is set correctly.
When setting the date and time, ensure that the watch is working.
Pull the crown out to the first click.
Turning the crown clockwise (12 o’clock direction):
Each time the hour hand makes two full rotations, the date is set back one day.
Before date adjustment
The crown can be turned in either direction to set the date, however, it is recommended to turn the crown in the direction which enables you to set the date with a smaller adjustment.
Turn the crown slowly.
When setting the hour hand, the other hands may move slightly. However, this is not a malfunction.
Turning the crown counterclockwise (6 o’clock direction):
Each time the hour hand makes two full rotations, the date is advanced one day.
-
Upon completion of setting, make sure that the time indicated is correct, and then push the crown back in. The date setting is now completed.
Relock the crown.
The date is designed to work in conjunction with the movement of the hour hand, therefore, incorrect setting of a.m./p.m. will cause the date to change at noon.
The crown can be turned in either direction to set the date, however, it is recommended to turn the crown in the direction which enables you to set the date with a smaller adjustment.
Turn the crown slowly, checking that the hour hand moves in one-hour increments.
When setting the hour hand, the other hands may move slightly. However, this is not a malfunction.
Tips for more accurate time setting
To ensure effective operation of the Spring Drive mechanism, observe the following instructions when you set the time.
-
Before setting the time, make sure to wind the mainspring sufficiently.
-
When starting to use a watch after it stops, wind the mainspring sufficiently. To set the time after that, wait for approximately 30 seconds after the seconds hand (or the small seconds hand) starts moving, then pull the crown out to the second click.
-
The seconds hand (or the small seconds hand) will stop moving when the crown is pulled out to the second click. Do not stop the movement of the seconds hand (or the small seconds hand) for longer than 30 minutes. If the stoppage of the seconds hand (or the small seconds hand) movement exceeds 30 minutes, push the crown back in, and wait for approximately 30 seconds after the seconds hand (or the small seconds hand) restarts moving, and then set the time.
-
If you set the time when the time the watch indicates is between 9:00 p.m. and 1:00 a.m., set the hour hand back to 8:00 p.m. temporarily, and then set the time.
(Ensure that the power reserve indicator is showing a fully wound state.)
(This procedure is required to ensure the proper engagement of the date driving wheels.)
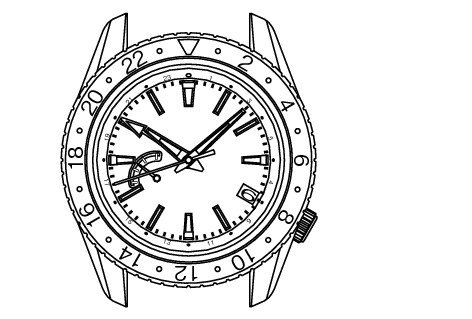
How to use the 24-hour hand
This watch has two different types of 24-hour hand usage.
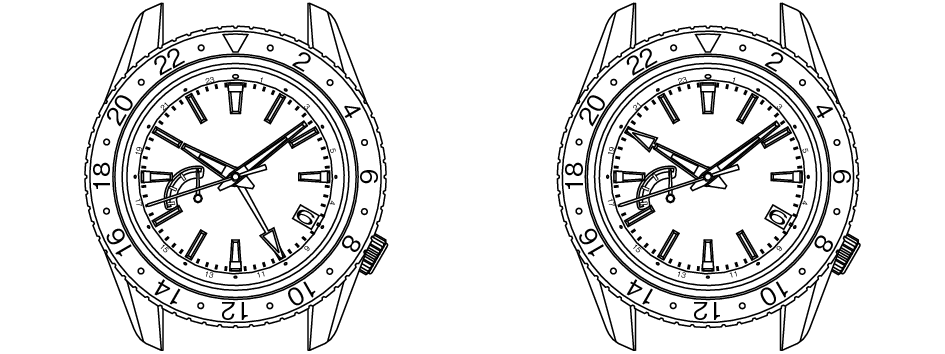
<Type 1>:
24-hour hand as an a.m./p.m. indicator
Simply using the 24-hour hand to show the 24-hour time as an a.m./p.m. indicator. (This is the standard usage type for the 24-hour hand.)
【Ex.】
Both the hour hand and the 24-hour hand are indicating the Japan time 10:00 a.m.
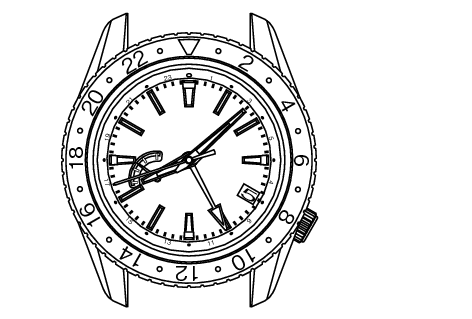
<Type 2>:
24-hour hand as a dual time indicator
Using the time difference adjustment function, set the 24-hour hand to indicate a time different from the time that the hour and minute hand indicate, which is of a place in a different time zone area with at least one hour of time difference from where you are.
【Ex.】
Hour hand:
Japan time 10:00 a.m.
24-hour Hand:
New York time 8:00 p.m.
Time difference adjustment function
For example, while traveling abroad and staying in a place with a different time from where you live, you can conveniently set the watch to indicate the local time in the different time zone area without stopping the watch.
The hour hand indicates the time of the place where you currently are, while the 24-hour hand indicates the time of the place of origin.
The date works in conjunction with the movement of the hour hand. If the time difference is correctly adjusted, the watch displays the correct date of the place where you are staying.
How to use the time difference adjustment function
-
Make sure that the mainspring is sufficiently wound and the watch is working.
-
Unlock the crown.
-
Pull out the crown to the first click.
-
Turn the crown to set the hour hand to indicate the time of the place where you are staying.
-
Upon completion of setting, make sure that the time indicated is correct, and then push the crown back in. The setting procedure is now completed.
When setting the hour hand to use the time difference adjustment function, ensure that the watch is working.
Pull the crown out to the first click.
Make sure that a.m./p.m. and date are correctly set.
The date is designed to work in conjunction with the movement of the hour hand, therefore, incorrect setting of a.m./p.m. will cause the date to change at noon.
List of time zone differences in major regions of the world
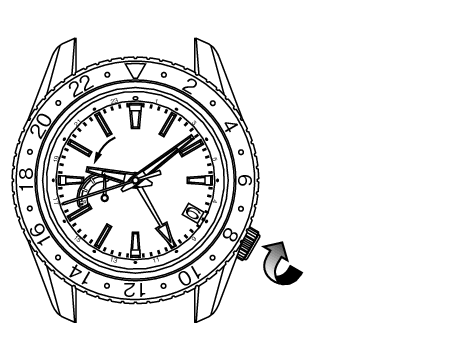
Turning the crown clockwise (12 o’clock direction): The hour hand is set back one hour.
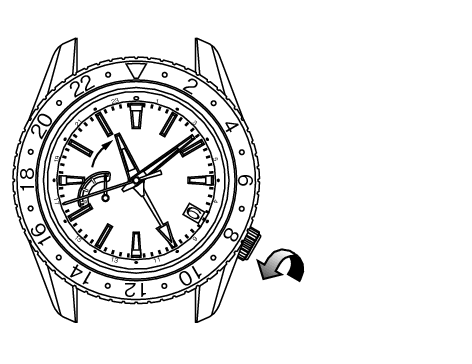
Turning the crown counterclockwise (6 o’clock direction): The hour hand is advanced one hour.
The crown can be turned in either direction to set the date, however, it is recommended to turn the crown in the direction which enables you to set the time difference with a smaller adjustment.
Turn the crown slowly, checking that the hour hand moves in one-hour increments.
While turning the crown, the moment the date changes is midnight.
When setting the hour hand, the other hands may move slightly. However, this is not a malfunction.
Relock the crown.
If you set the time during any time between 9:00 p.m. and 1:00 a.m., temporarily set the hour hand back to 8:00 p.m., and then set the time.
Selectable display mode
With the time difference adjustment function, the watch features a dual time display which shows time in two different time zones. It offers two display modes which you can select to suit your needs and preference.
【Ex.1】
Hour hand and date:
Area A (Japan)
24-hour Hand:
Area B (New York)
【Ex.2】
Hour hand and date:
Area B (New York)
24-hour Hand:
Area A (Japan)
Set the 24-hour hand first, and then set the hour hand.
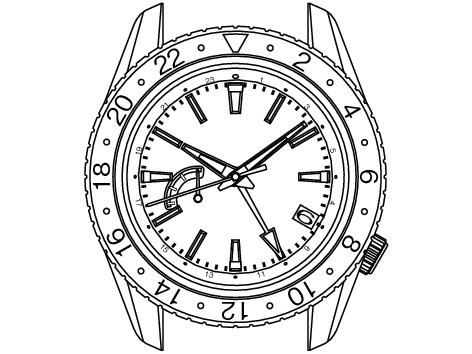
How to use the bi-directional rotating bezel
Some models may have a bi-directional rotating bezel, the rim of the glass.
By utilizing the 24-hour indicators imprinted on the rotating bezel, the watch can independently display the time in one or two different time zones in addition to the time indicated by the hour hand.
To set the 24-hour hand to indicate the time in Paris and Bangkok which are located in two different time zones, while setting the hour hand to display 10:08 a.m., Japan time.
To use the 24-hour indicators on the rotating bezel to indicate the hour in Bangkok.
-
First, set the
 mark on the rotating bezel to the 12 o’clock position.
 -
Refer to Time difference adjustment function, and set the hour and minute hands to 10:08 a.m. and align the 24-hour hand with “2” on the rotating bezel.
-
There is a +6-hour time difference between Paris and Bangkok; the time in Bangkok is 6 hours ahead of the time in Paris (when daylight saving time is not in effect). Turn the rotating bezel counterclockwise to move the
mark back 6 hours on the 24-hour indicators.
Time in Paris is 8 hours behind Japan except for summer seasons when daylight saving time is observed.
The hour in Paris is shown by the 24-hour hand pointing to “2” (2:00 a.m.) of the 24-hour indicators on the dial (or the outer frame of the dial), while the hour in Bangkok is shown by the 24-hour hand pointing to “8” (8:00 a.m.) of the 24 hour indicators on the rotating bezel.
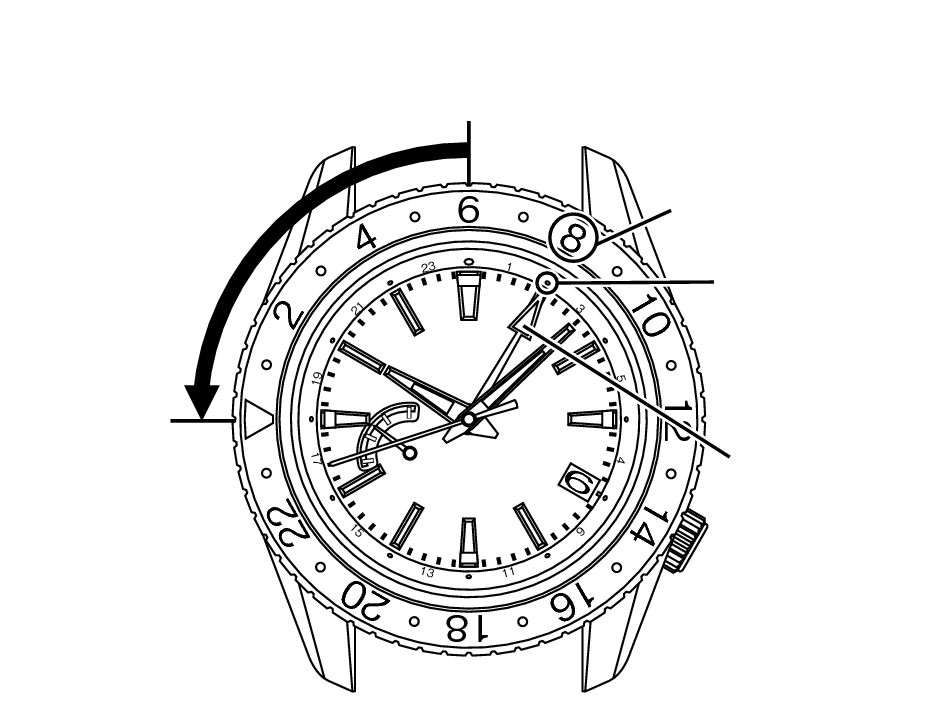
Turn the rotating bezel counterclockwise
6 gradations, so that the 24-hour indicators on the rotating bezel are advanced for 6 hours.
Bangkok 8:00 a.m.
Paris 2:00 a.m.
24-hour hand